Instructions - Simple & Fast Set-Up!
Pre-Assembled for Easy Installation
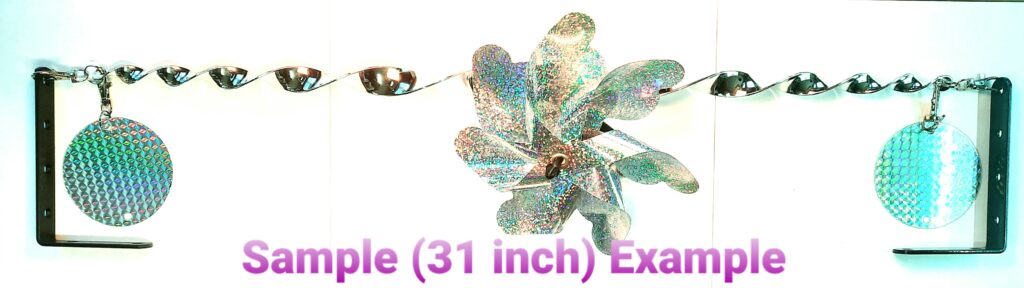
Twirly Bird Away comes in Several Adjustable Lengths
Can be Hung Vertically, Horizontally or even Diagonally
Conveniently Pre-Assembled, yet can easily be altered to fit any size area
Each section snaps quickly together to create any length
Attach under eaves, on siding, in front of windows, in front of roll-up warehouse
doors, in trees, on decks and balcony’s – anywhere birds are a nuisance
Directions for Installation:
• Measure the area you want to be protected by Twirly Bird Away. If necessary, reassemble
the Twirly Bird Away to the length you need, using the snaps to easily move pieces around.
• HELPFUL HINT: Discs and Pinwheels can be attached lengthwise – or left dangling – this gives you the ability to go from the shortest lengths to the longest lengths, as needed.
1.) Attach the first bracket using the 2-inch side to attach to the structure,
with the long 5-inch side facing outward to hang the Twirly Bird Away. (Two sizes of screws included for your convenience.)
*Place bracket against wall to mark holes with a pencil and use a drill to start the screw holes.
• IMPORTANT – DO NOT ATTACH THE 2ND ELBOW BRACKET TO THE STRUCTURE UNTIL YOU HAVE HUNG THE TWIRLY BIRD AWAY FROM THE FIRST BRACKET.
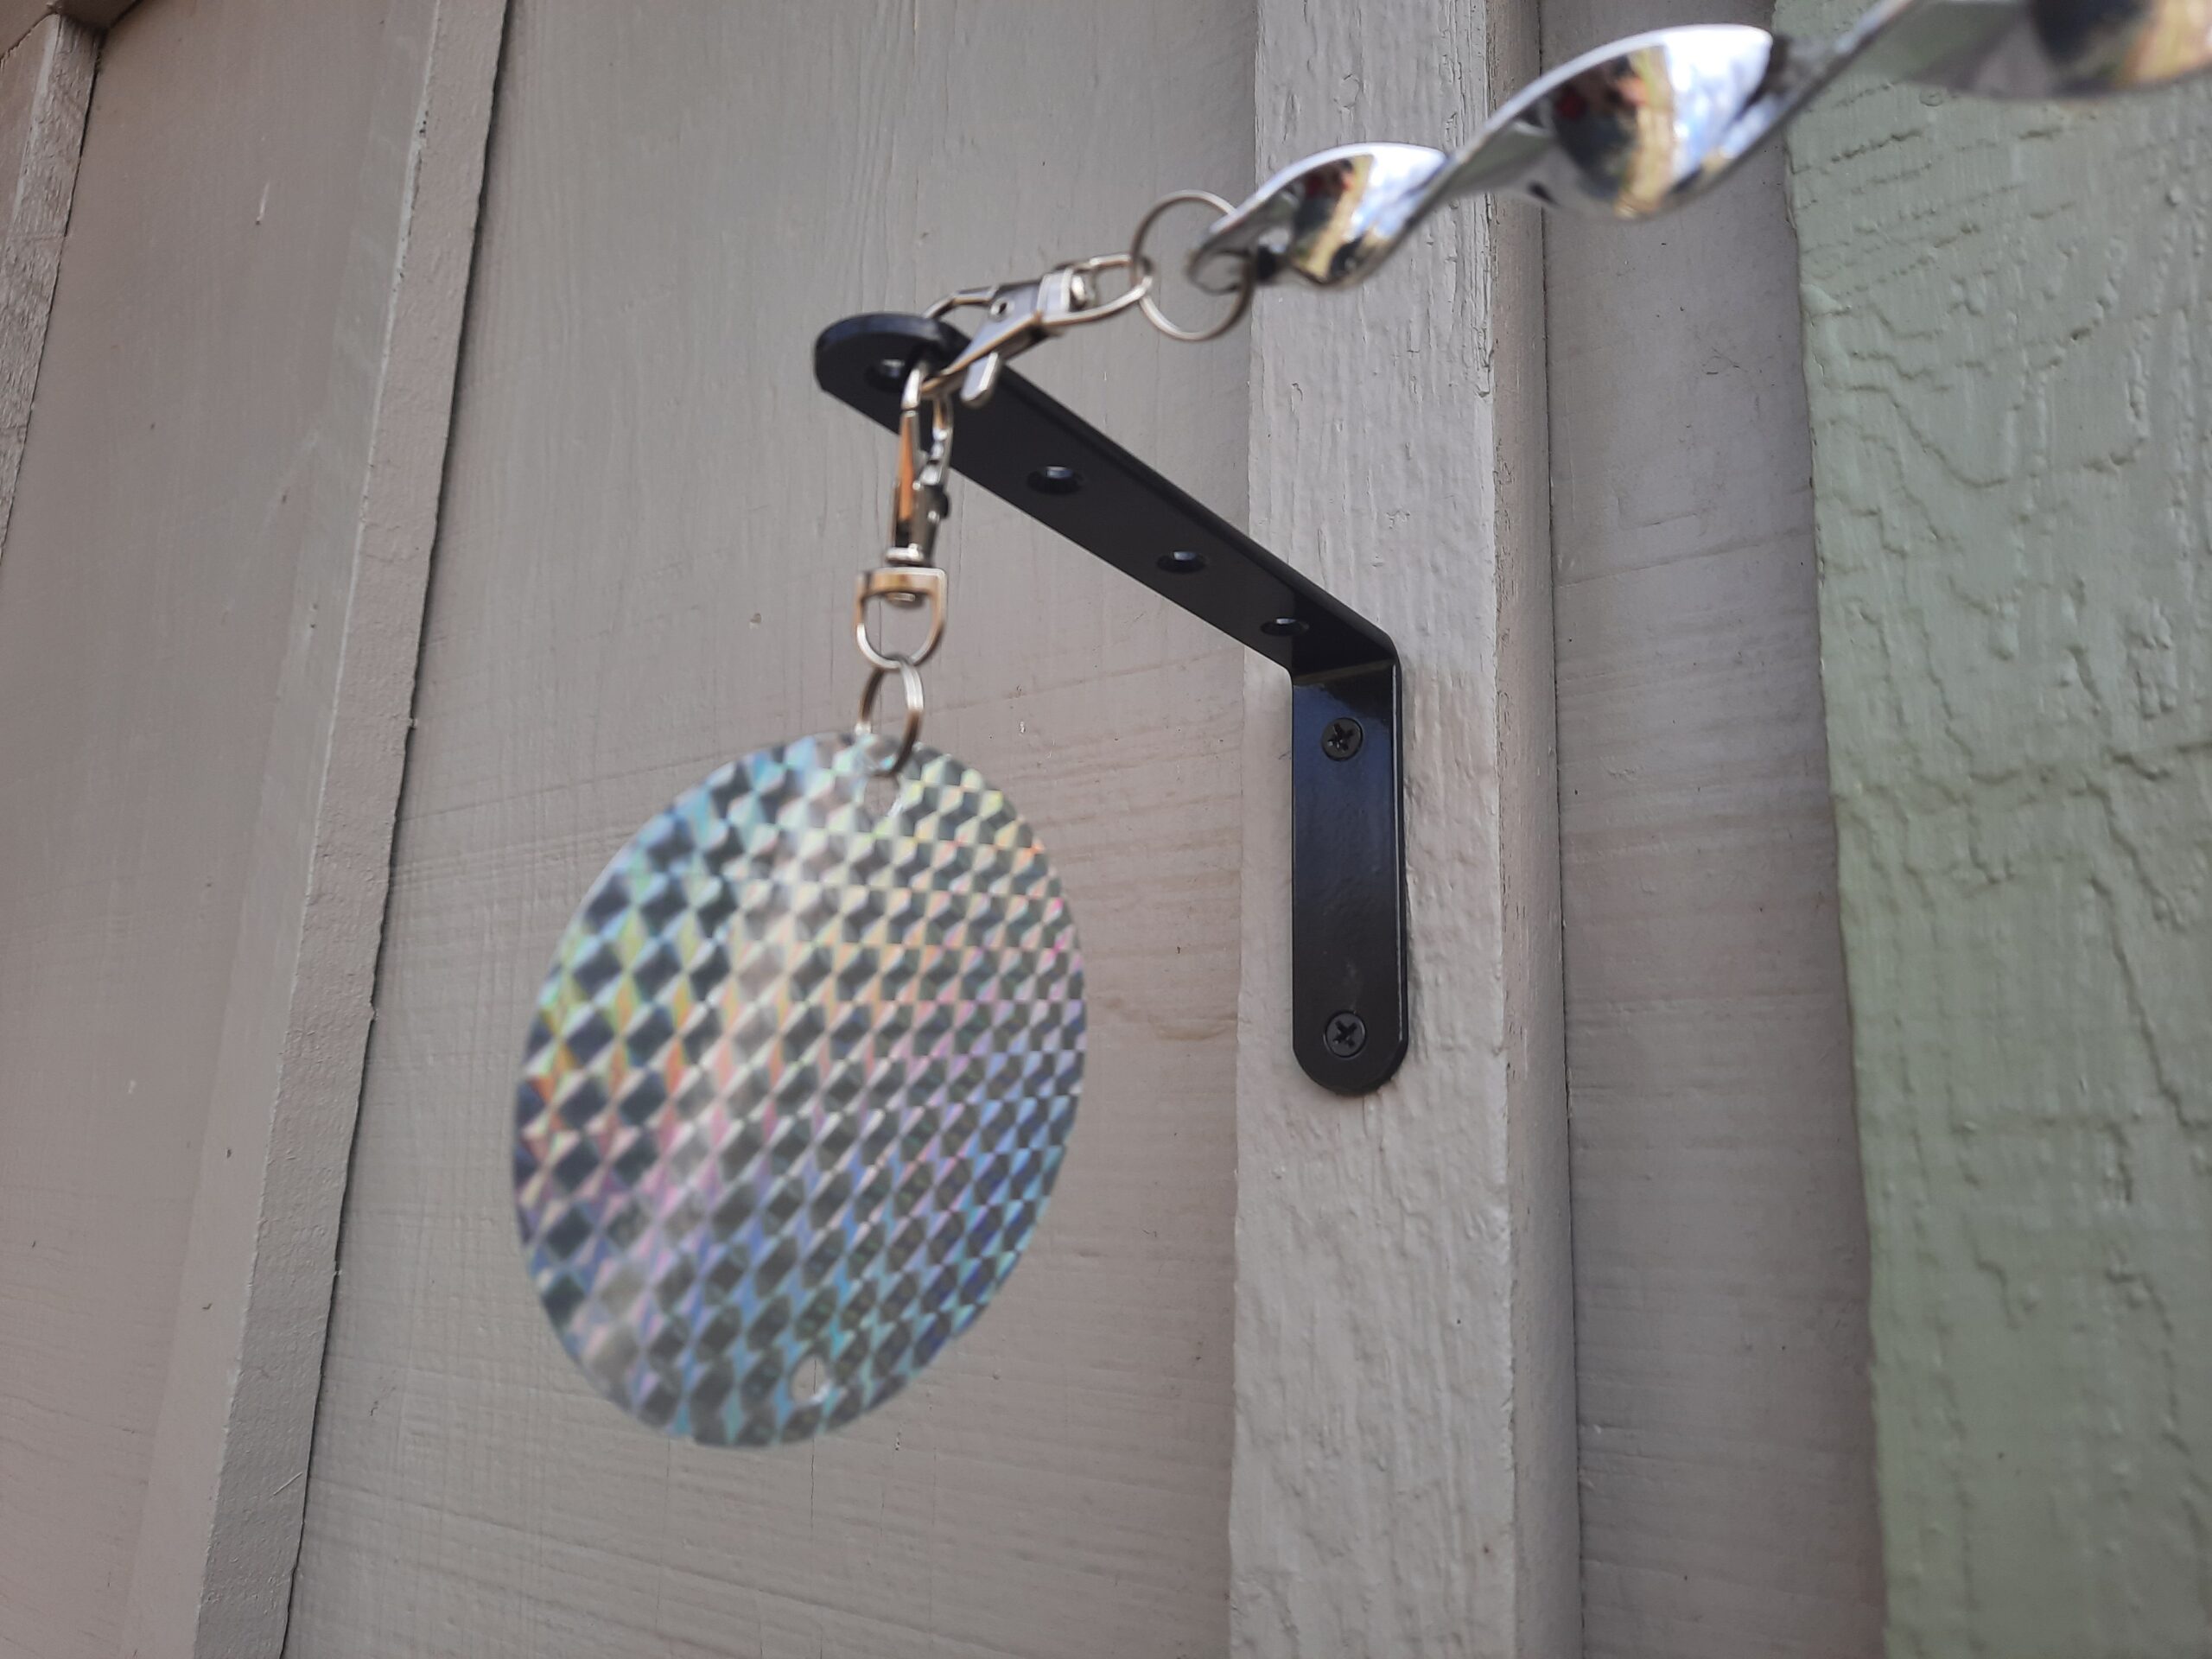
2.) Snap the Twirly Bird onto the furthest hole in the attached bracket,
which will be 5 inches out from the structure. Take the loose end of the Twirly Bird and snap the 2nd elbow bracket onto the dangling end, using the last hole of the 5-inch-long side of the bracket. Now you are able to confirm where to place / attach the elbow bracket to the structure. Place bracket against wall to mark holes with a pencil and use a drill to start the screw holes.
• VERY IMPORTANT: You want the Twirly Bird Away to hang taught enough that the Pinwheels will not contact the structure during winds. But – Not Too Taught – or it will not spin as freely as desired.
3.) Attach the second bracket using the 2-inch side
to attach to the structure, same installation process as first bracket.
- If Needed – Use the Chain Link provided to get the exact length by attaching one end of the chain link onto the end snap, then run the chain through the last hole on the 5-inch end of the bracket, pulling snug, and bring the chain back up to the snap, attaching at the needed length. This makes adjusting to the exact right length a snap!
• FOR WINDOWS: Attach the elbow brackets onto the trim around the window, to hang the Twirly Bird Away in front of the entire window – to prevent birds from crashing into the window. (More than one Twirly Bird can be used on a single window.)
Follow Directions from above: To attach the elbow brackets to the window trim – as directed above For Structures.
• FOR CAMPSITES, POP-UPS, CARPORTS, TREES, ETC: Use the enclosed string to attach to trees, or support beams, or whatever works within reach. (Close-Line and/or Zip Ties often come in handy.) Hang near picnic tables, in Expo Booths, where you park your car, or anywhere that birds might be a nuisance. When camping – please respect nature and remove ALL pieces when done camping.